Installing Windows 10: What to do when there’s not enough storage space

 Image: Rob Schultz
By now, most people who want Windows 10 on their PCs (and some who don’t) have probably installed the upgrade by now.
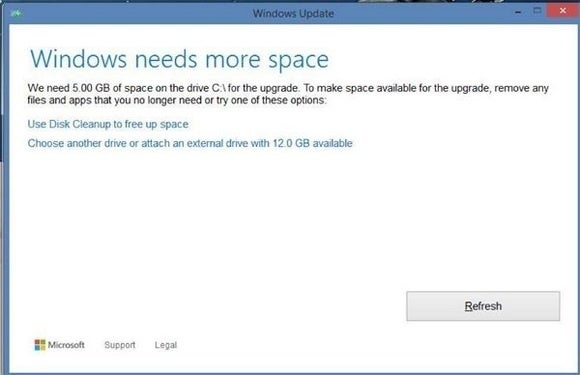
But there is at least one notable exception: If you don’t have enough free storage space on your hard drive, the installation won’t complete. This may result in a “Windows needs more space” dialog box, or one of several error codes (including 0x80070070 – 0x50011, 0x80070070 – 0x50012, or 0x80070070 – 0x60000).
Time’s running out to clear some space and complete the installation. Here’s what you can do to make sure the upgrade goes through:
Windows 10: How much space you need
While the install files for Windows 10 take up just a few gigabytes, going through with the installation requires a lot more space. According to Microsoft, the 32-bit (or x86) version of Windows 10 requires a total 16GB of free space, while the 64-bit version requires 20GB. (To see which version you’re running, open the Control Panel, click on System, then look under the “System type” label.)
On some devices, such as Windows 10 tablets with only 16GB or 32GB of storage, Windows may perform a compressed installation. This only requires 8.5GB of free space. In any case, Windows will tell you how much additional space it needs when the “Windows needs more space” dialog appears.
How to free up storage space for Windows 10

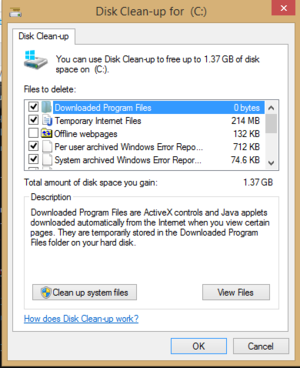
The simplest way to reclaim storage space in Windows is through Disk Cleanup. Head to File Explorer, then right-click on the C: drive, and click Properties. Under the General tab, select Disk Cleanup. Windows will locate temporary files, Recycle Bin files, and error-related data that it can discard. Some of these files and data will be selected for removal by default, but be sure to also check the box for “System error memory dump files,” as these are fairly safe to remove and can be storage hogs.
To reclaim even more space with Disk Cleanup, head to the More Options tab, then select Clean up under the System Restore and Shadow Copies section. Just a word of caution: This will eliminate all but your most recent restore point, limiting your ability to roll back to a previous state in case your PC is having problems.
Beyond Disk Cleanup, some other ways to reclaim space include clearing out your Downloads folder, uninstalling programs, and using an external drive or cloud storage for space-heavy files, such as photos and videos. For more space-saving tips, check out this PCWorld article.
Alternative: Bring in additional storage to complete the upgrade
If Disk Cleanup doesn’t give you enough space, and you’d rather not touch the files and programs that are on your hard drive already, you can connect an external drive or select a secondary hard drive to finish the installation. External storage can include a USB stick, external hard drive, or MicroSD card. The amount of space required on that drive will depend on the system, but you shouldn’t need any more than 16GB in any case.
 Asus
Asus To use an external drive, proceed with the installation until you reach the “Windows needs more space” screen, then select Choose another drive or attach an external drive. Select the drive you want to use from the drop-down menu.
One thing to remember: When choosing this option, your previous version of Windows will be stored on the external drive, under a folder called Windows.old. Should you decide that Windows 10 isn’t for you, you’ll have to connect the external drive to roll back to Windows 7 or Windows 8.
How to reclaim storage space after upgrading to Windows 10
If the Windows 10 installation leaves you with less space than you’d like, you have a couple of easy options.
The first is to remove your previous Windows install. Obviously, only do this if you’re completely satisfied with Windows 10 and have no intention of returning to an earlier version (or if 31 days have passed since the upgrade and you can’t go back anyway). Return to Disk Cleanup, and this time, select Clean up system files. Select Previous Windows installation(s) from the list, then hit OK.
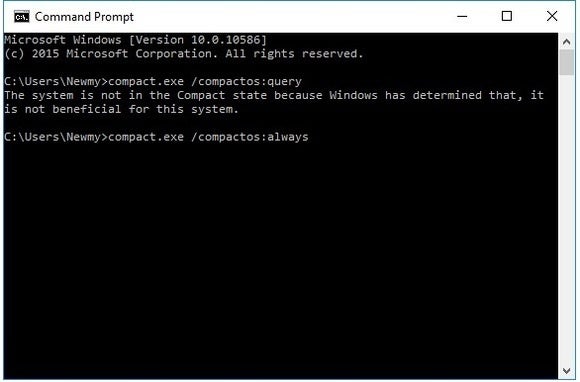
Another option is to compress the operating system if it’s not compressed by default. Open Command Prompt as an administrator. (Do this by typing “Command” into the search box, then right-clicking Command Prompt, then clicking Run as administrator.) Then, enter the following command:
compact.exe /compactos:query
If the system is not compressed already, enter the following:
compact.exe /compactos:always

Compressing the operating system may cause a slight performance hit, but it could free up a few gigabytes on your machine.
For more advice on Windows 10, check out the best tips, tricks, and tweaks, and other fixes for common update woes.


