When to defrag a hard drive, TRIM an SSD and other storage tasks

 Image: IDG
We still get quite a few questions about when and how to optimize storage devices. Easy answer: The care and feeding of storage devices is either taken care of automatically by Windows, or it’s simply unnecessary. Mostly.
[Have a tech question? Send your query to [email protected].]
Defragging
Defragging hard drives (not SSDs) has been of limited benefit since Microsoft switched to the NTFS file system. Why? Because to a large extent, NTFS is self-optimizing. Add Windows’ various tricks such as pre-fetch, better ordering of files, and hard-wiring important files to set locations, and there’s rarely any noticeable degradation in hard drive performance even after years of use.
That said, many external drives come formatted to FAT16, FAT32, or exFAT. These might benefit from optimization after a lengthy period of heavy use. Whether the time you save during normal use after the fact adds up to the time you spend optimizing the hard drive, or the additional wear and tear on the drive are worth it, are debatable.
Back in the days of FAT, DOS, and slow 80MB hard drives, there was a noticeable uptick in performance after a defrag. Now, not so much. Additionally, the last few iterations of Windows automatically take care of what little defragging or optimization is required. We suggest you leave it alone.
Should you not take our advice, there’s major caveat—NEVER defrag an SSD. SSDs work in an entirely different manner from hard drives; spreading data over multiple channels to multiple chips. Attempts to defrag do nothing but use up precious write cycles (sometimes as few as 1,000), prematurely aging the SSD.
Checking for errors
 IDG
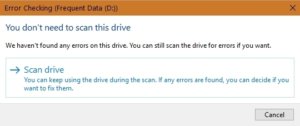
IDGMicrosoft is telling the truth, if there’s hardly ever any need to check for errors anymore. And most of the time it’s external media that may have been removed before writes were finished.
The Scan drive command and CHKDSK (the command-line variant) are another matter. They are very useful after system crashes, blue screens of death, and the like. So much so, that Windows generally lets you know when you need to do it. You can scan or Chkdsk an SSD (right-click a drive letter, then select Drive Properties > Tools > Check), so long as you don’t scan sectors, which again, due to the way SSDs operate—is nothing but a waste of time and write cycles.
 IDG
IDGRunning CMD as administrator, CHKDSK is still a handy way to check drives after a power failure. You can do the same thing under Drive Properties.
Note: If you run CMD/CHKDSK and you get a permissions error, you’ll need to run CMD as Administrator. Type CMD into the search Windows field, then right-click on Command Prompt to reveal that option.
Optimize and TRIM
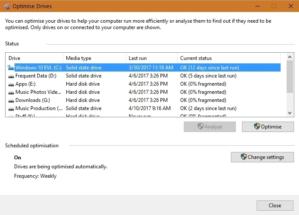
Windows uses Optimizing as a catch-all phrase to cover both defragging hard drives and trimming SSDs. The Optimize console is available by right-clicking a drive letter in Windows Explorer, then selecting Properties > Tools > Optimize. With hard drives, Optimize will do a minor defrag or file system check; with SSDs it forces the TRIM command.
 IDG
IDGWindows automatically takes care of optimizing both hard drives and SSDs for the most part.
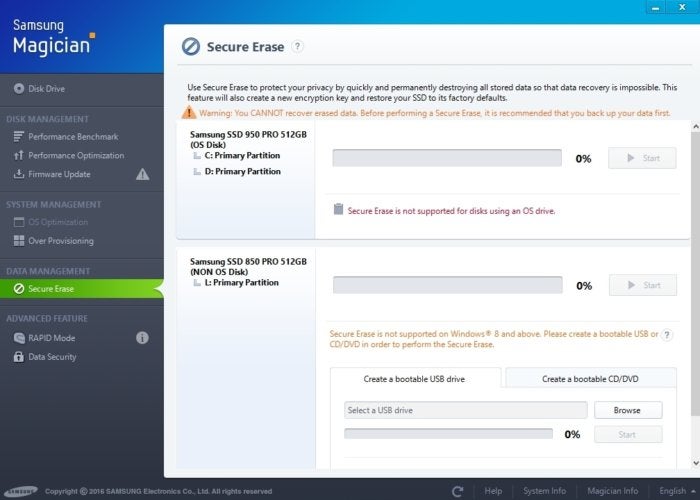
Sending a TRIM command to an SSD simply tells it that it’s time to clean house. Normally, you’ll only find the command by that name in the utilities that accompany SSDs, such as Samsung’s Magician shown below. Trimming erases cells and blocks of NAND that no longer contain data, and consolidates data into fewer locations.
Because these operations take an eternity in computer terms (anywhere from a couple of seconds to a minute), they are often deferred until the drive isn’t busy. Or in many cases, until explicitly invoked via the TRIM command. Forcing TRIM can restore most of your SSD’s missing performance, but if you want all of it…
Secure Erase
For hard drives, secure erase is simply a way to erase all the data in a largely unrecoverable manner. That is, not just deleting and creating a new partition, or reformatting but overwriting previous data. It can take a very long time.
For an SSD, a secure erase deletes all the data, but also zeroes the lookup tables and takes the drive back to its virgin, out-of-the-box performance. Or at least as close to it as you’ll ever get. We never seem to get quite the same numbers after testing and a secure erase, but we get much closer than after a simple TRIM.
 IDG
IDGSamsung’s Magician software and its secure erase feature. This erases all data on the drive, but can bring back the drive’s out-of-box performance. Or almost.
SSDs are generally so fast that you should do a secure erase only if the drive has been operating close to full capacity for quite a while, or you’re noticing a significant degradation in performance, which is rare these days.
You’ll will want to perform a secure erase before you give away or sell the drive to make sure the data is recoverable only by the most prohibitively expensive forensic methods.
Final advice
For most users, the Windows Optimize console set to auto-pilot is all that’s needed. However, for advanced users, manual TRIM on SSDs and defragging a hard drive can occasionally be useful. Just be sparing, and in the case of secure erase, make sure you have a recent backup.


