3 encryption tools for Linux that will keep your data safe

 Image: Yuri Samoilov
Encryption is an interesting thing. The first time I saw encryption in action was on a friend’s Gentoo Linux laptop that could only boot if the USB key with the boot partition and decryption key was inserted. Cool stuff, from a geek point-of-view.
Fast forward, and revelations from Edward Snowden and ongoing concerns about government snooping are slowly bringing encryption and privacy tools into the mainstream. Even if you’re not worried about a Big Brother or some shady spy-versus-spy scenario, encryption can still protect your identity and privacy if your laptop is stolen. Think of all the things we keep on laptops: contact information, financial information, and client and company information. All of that data is worthy of protection. Luckily, Linux users have access to several tools for the affordable price of free.
There are three main methods for protecting the data on your laptop, each with its own strengths and weaknesses.
1. OpenPGP and email encryption
Using Pretty Good Privacy (PGP) encryption to protect email isn’t anything new. While the original PGP implementation is proprietary, the OpenPGP specification was written in 1997. OpenPGP makes use of public-key cryptography, which means every keypair comes with a private and public key. You use a private key (that you keep secret) to unlock and sign files, while a public key (that you give away to people) can be used to encrypt files to you and verify files you’ve signed.
In the context of email, your plaintext email is encrypted with a public key into either a file or ASCII cycphertext (which looks random to people and machines) that can only be read by someone with the matching private key. In basic terms, this means that the email is encrypted before it leaves your PC, so no amount of snooping on the email server you’re using will allow someone to see the contents of the file. This is known as end-to-end encryption. (Metadata, like the subject line, recipients, and time sent are all left in plaintext, however.)
The most widely used implementation of this standard (as far as Linux users are concerned) is GNU Privacy Guard (or GnuPG or GPG).

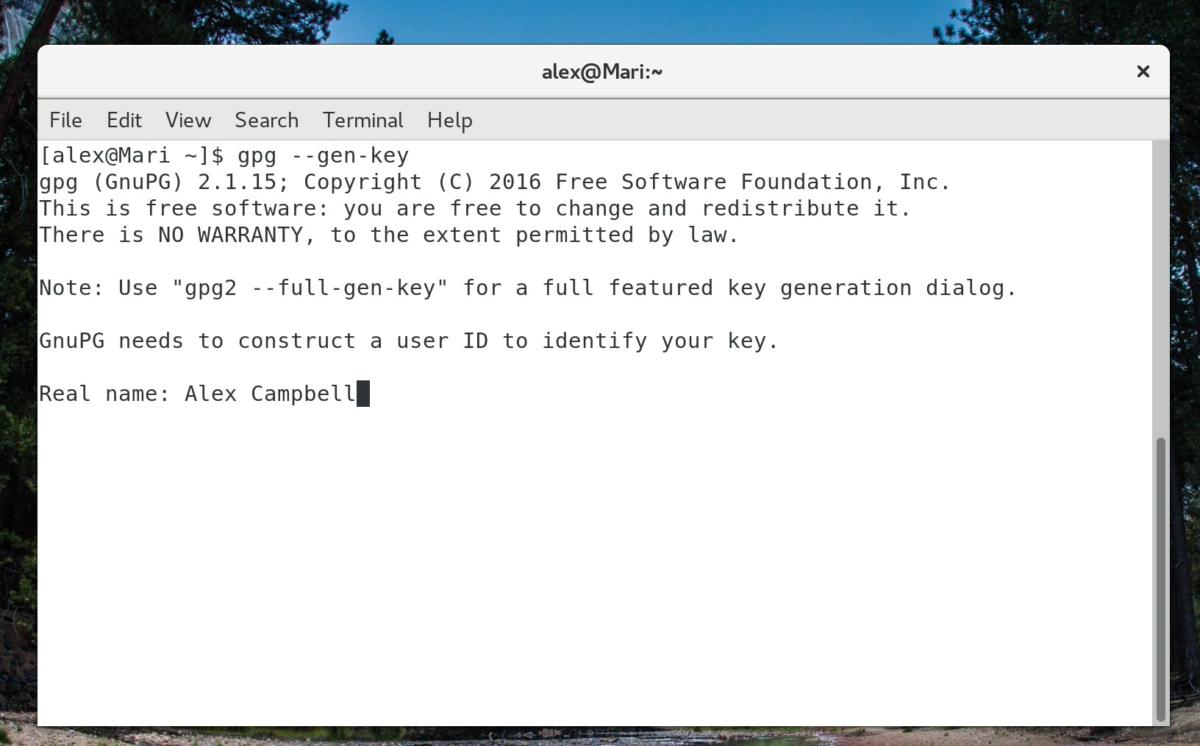
To create a GnuPG keypair using the command line, use gpg —gen-key.
Most modern Linux distributions come with GnuPG preinstalled. If it isn’t, it can be easily found using your distribution’s package manager, usually with the name gpg.
While you can use GPG on the command line, it’s often easier to create and manage keys using a GUI program. The GnuPG team provides the GNU Privacy Assistant (GPA) GUI to create and manage keys. If you prefer a KDE-compatible interface, you can install Kleopatra, while GNOME 3 users might prefer GNOME’s Seahorse. GnuPG is also available for Windows using GPG4Win, which provides Windows versions of both Kleopatra and GPA.
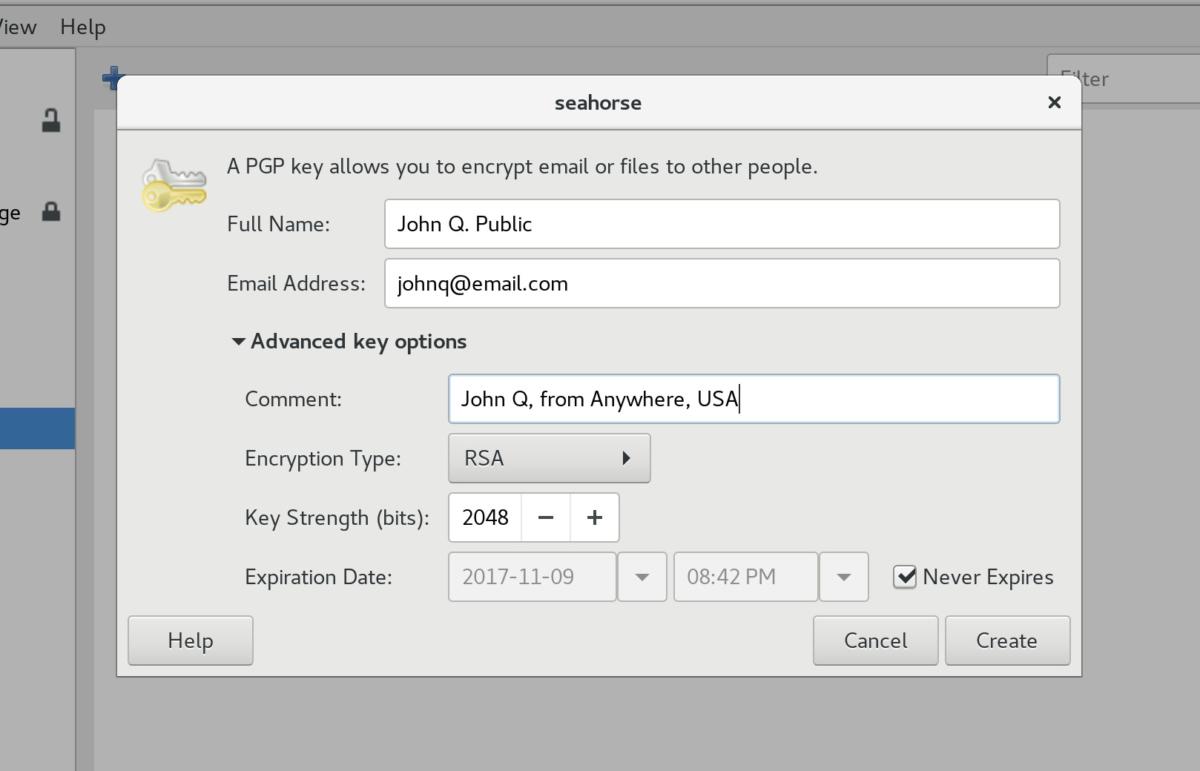
Before you can encrypt files or email with OpenPGP, you’ll need to create your first keypair. When you create your key you’ll need to provide (at minimum) a name and email address to help identify the key. You’ll also need to provide a key strength. While a 2,048-bit key is considered pretty safe, a 4,096-bit key will provide more protection, though at the expense of slightly longer times for key creation, encryption, and decryption.

You can use a GUI to create your keys if you’re not confident about the command line.
How you set up GnuPG for use with your email will vary depending on the client you use. If you use Mozilla’s Thunderbird, you’ll need to install the Enigmail extension. Both KDE’s KMail and GNOME’s Evolution support OpenPGP natively. KDE’s online documentation provides a manual for GPG integration with KMail, and Fedora has a great how-to for Evolution. There are a few browser plugins like Mailvelope (which offers add-ons for both Chromium/Chrome and Firefox) that work pretty well for those who prefer webmail.
GnuPG provides a great in-depth online manual on how OpenPGP works and how to use the GnuPG tools. If you’re using Kleopatra, many of the steps outlined in PCWorld’s tutorial on GPG4Win will apply to Linux as well.
2. Encrypted containers
Not everything you want to keep secret or secure is a text file or email. To secure groups of files, some people prefer to use encrypted containers.
Containers are handy because they’re portable. In its simplest form, a container is a lot like a zip file that’s encrypted. That file can be in your home folder, copied to a USB drive, stored in the cloud, or put anywhere else that’s convenient.

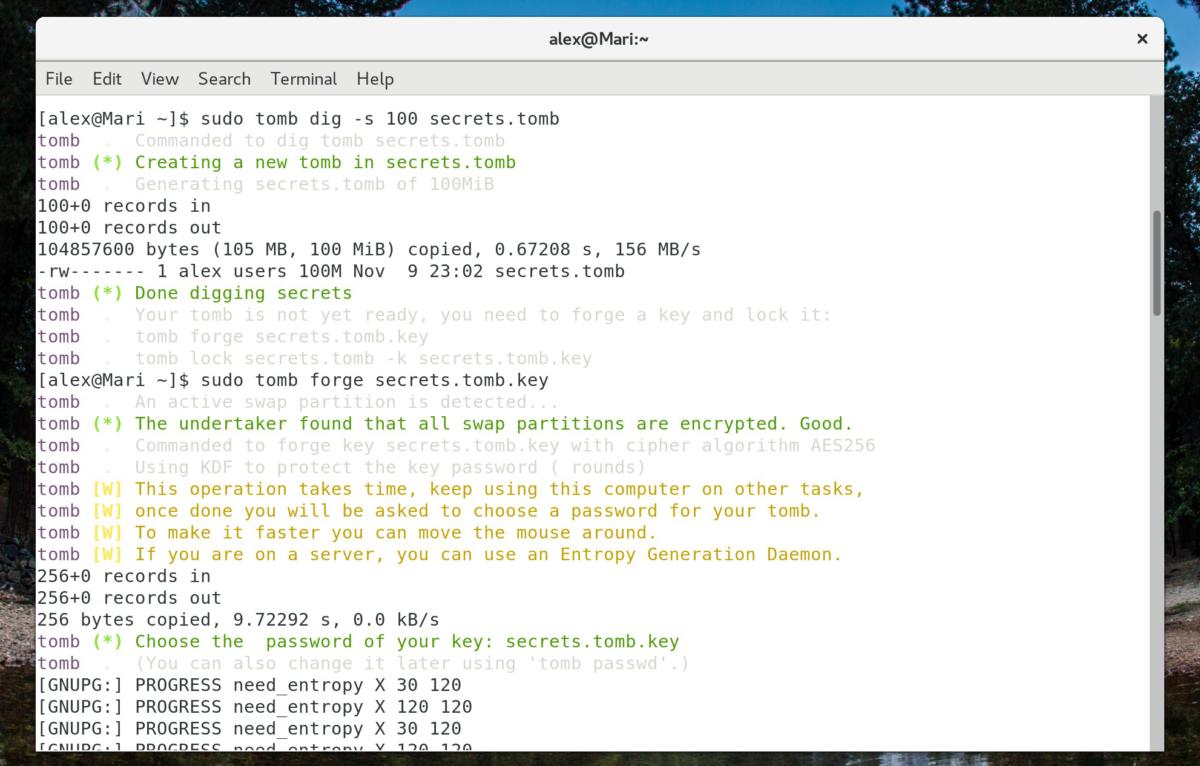
Setting up a container and key using Tomb is really easy, if you’re comfortable with the command line.
The most basic container can be a zip or gzipped tar file (.tar.gz) that you encrypt using OpenPGP. The downside to such a simple container is that you have to delete the plaintext (decrypted) file once you’re finished with it. If you have to modify or add files in the archive, you basically have to delete the old file and encrypt a new one.
A simpler and more secure way to handle containers is to use VeraCrypt (the successor to TrueCrypt). VeraCrypt is capable of creating encrypted containers of fixed size, which can help obscure the size of the files in the container. There’s a good tutorial on VeraCrypt’s website that explains how to create such a container. The good thing about using a VeraCrypt container is that you can access its contents using VeraCrypt on both Windows and Linux.
Finally, there’s a tool called Tomb. Tomb is little more than a script, but it makes creating and managing containers and keys for dm-crypt really easy. The dm-crypt utility is standard to Linux and is its built-in disk encryption engine (I’ll get to more on that in a bit), but it can also be used to create containers. Tomb’s usage is quite simple, and the project website offers useful guidance.
3. Whole-disk encryption
Sometimes, it can just be easier to encrypt everything on your system. That way, there’s little need to worry (for the most part) about what files are stored where. Everything is protected, so long as your PC is off.
Windows users may recall that VeraCrypt (or TrueCrypt) can encrypt drive partitions and entire disks. This can be done on Linux as well, but most users will likely prefer to use Linux’s built-in disk encryption tool, dm-crypt.

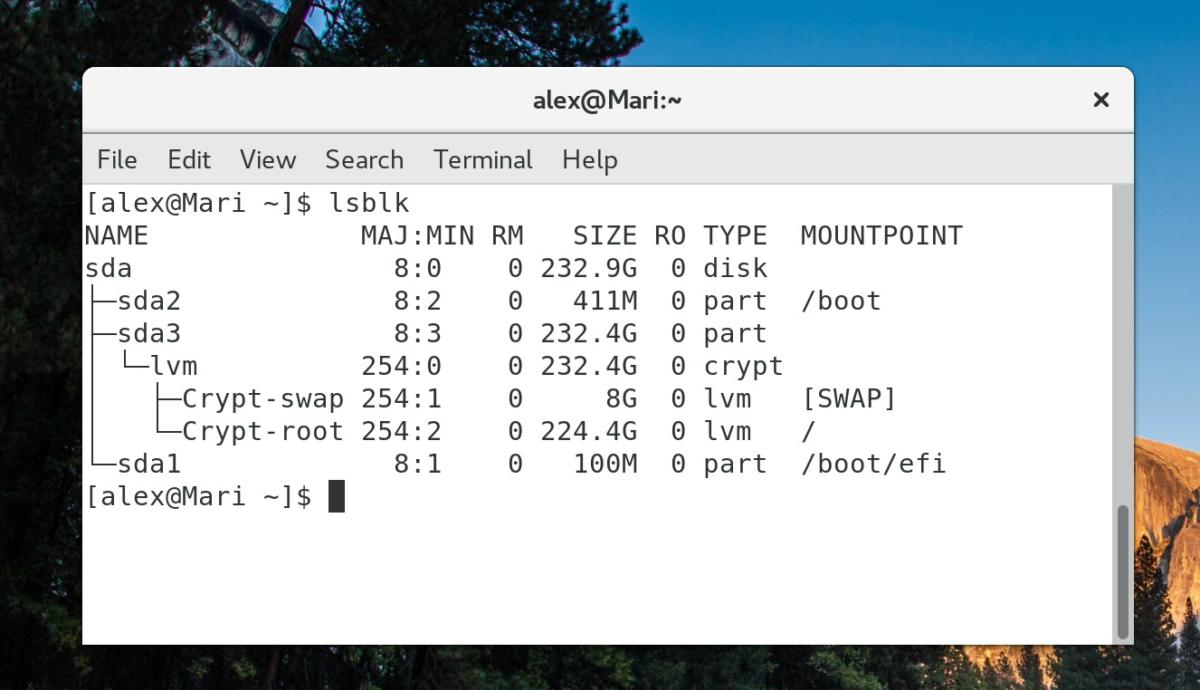
A partition tree viewed with lsblk. Note that the encrypted partition /dev/sda3 is host to the LVM partitions that are mounted to the root directory (/) and swap, while the boot partition (/dev/sda2) is unencrypted.
By itself, dm-crypt and its tool cryptsetup are very basic and can be a little cumbersome, since dm-crypt can only use a single key. Most people prefer to use Linux Unified Key Setup (LUKS) to manage keys for an encrypted device, which allows up to eight keys to be used with dm-crypt, such that any one key or passphrase supplied can unlock the drive. When using dm-crypt to encrypt a drive, a passphrase must be entered at boot time to unlock it.
I should also note that LUKS and dm-crypt are the underlying programs that Tomb uses to work its magic.
Setting up dm-crypt, LUKS, and optionally LVM (logical partitions) can be a messy task for a newbie. For users who feel up to the task, the Arch Linux Wiki has a great guide on using LUKS and dm-crypt to encrypt a system. For those less inclined to get down and dirty with terminal commands, there’s an option to use LVM and LUKS drive encryption when you install Ubuntu or Debian.
There are a couple pitfalls when using whole-disk encryption. First off the boot partition (/boot) is usually left unencrypted, since the system has to boot to an initial ramdisk to get itself going. The system can’t do that if the ramdisk and boot partition are unreadable. (You actually can encrypt the boot partition, but it takes extra steps and is a bit more tricky.) The consequence of this is that it if someone got their hands on your PC, they could theoretically install a modified kernel that could harvest your passphrase. It’s an unlikely scenario, but technically possible. This can be circumvented by placing your boot partition on a USB thumb drive that you keep separate from the system.
The minute you turn on your PC and unlock the disk, files on the system can be read as though it weren’t encrypted at all. If your laptop is stolen and you don’t have a screen lock enabled, someone could simply compromise your system as long as it has power (which is very similar to device encryption on an Android phone).
Finally, SSDs present special problems because of the way they allocate and clear (or don’t clear) cells. You can still use an SSD with disk encryption, but extra steps should be taken when preparing the drive.
Even with a few pitfalls, I consider using disk encryption on laptops to be a very good practice. While encrypting desktops is less common because they are stolen less frequently, everyone has seen someone leave a laptop at a coffee shop or on a chair on campus. I rest a little easier knowing that if my laptop is ever lifted, I’m only losing a device, not my privacy along with it.


