How to disable Cortana in Windows 10

 Image: Microsoft
Killing Cortana isn’t as easy as it used to be.
When Windows 10 first released, turning off Cortana was as simple as flipping a switch in the digital assistant’s settings, but Microsoft removed the option in the Windows 10 Anniversary Update. Now there’s no obvious way to disable Cortana—but it is possible using not-so-obvious methods.
Completely eradicating Cortana requires a quick and easy registry edit, which we’ll detail here. If you don’t want Cortana spying on you but also detest the idea of mucking with your PC’s deepest software innards, PCWorld’s guide to privacy-boosting Cortana tweaks can show you how to limit the personal information it sends Microsoft. Cortana will still run in the background with limited functionality if you don’t perform the registry edit, though.
How to turn off Cortana in Windows 10
Hold your horses! As simple as this is, it’s always a good idea to create a system restore point before editing the Windows registry—so go ahead and do that now. It only takes a minute. (Ironically, the easiest way to do so is to search for “restore point” with Cortana.)
With that out of the way, let’s start registry hacking.
 Brad Chacos/IDG
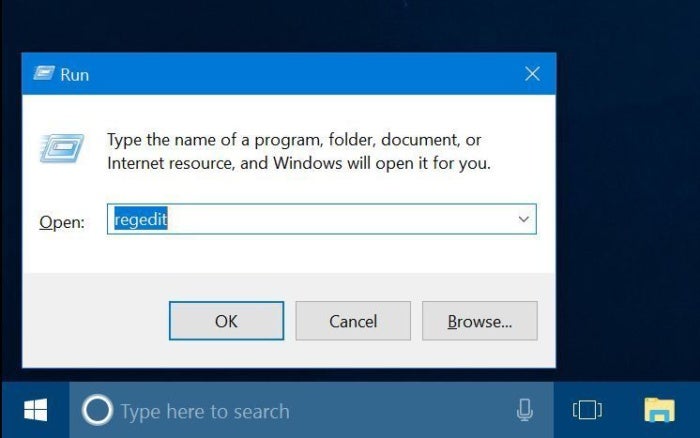
Press Windows Key + R simultaneously on your keyboard to bring up the Run interface, then type regedit into the box and press Enter. Depending on your security settings you may be prompted to give Windows permission to run the Registry Editor. If so, do so.
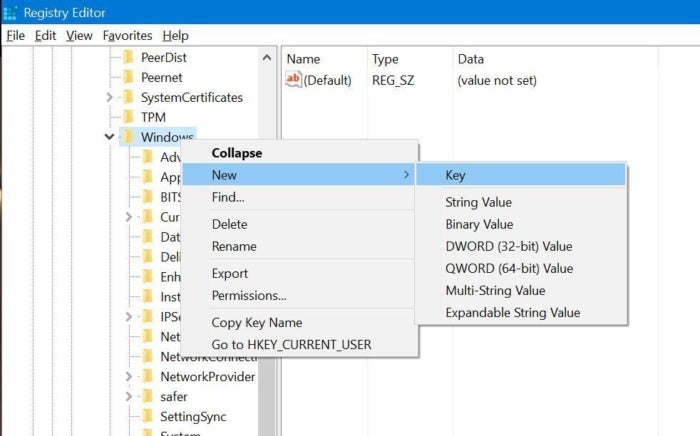
Once the Registry Editor is open, navigate to the following folder in the left-hand navigation pane: HKEY_LOCAL_MACHINE > Software > Policies > Microsoft > Windows > Windows Search.
 Brad Chacos/IDG
Here’s the only potentially tricky part: You might not see a Windows Search folder. If it isn’t there, right-click the Windows folder, select New > Key, and name it Windows Search.
 Brad Chacos/IDG
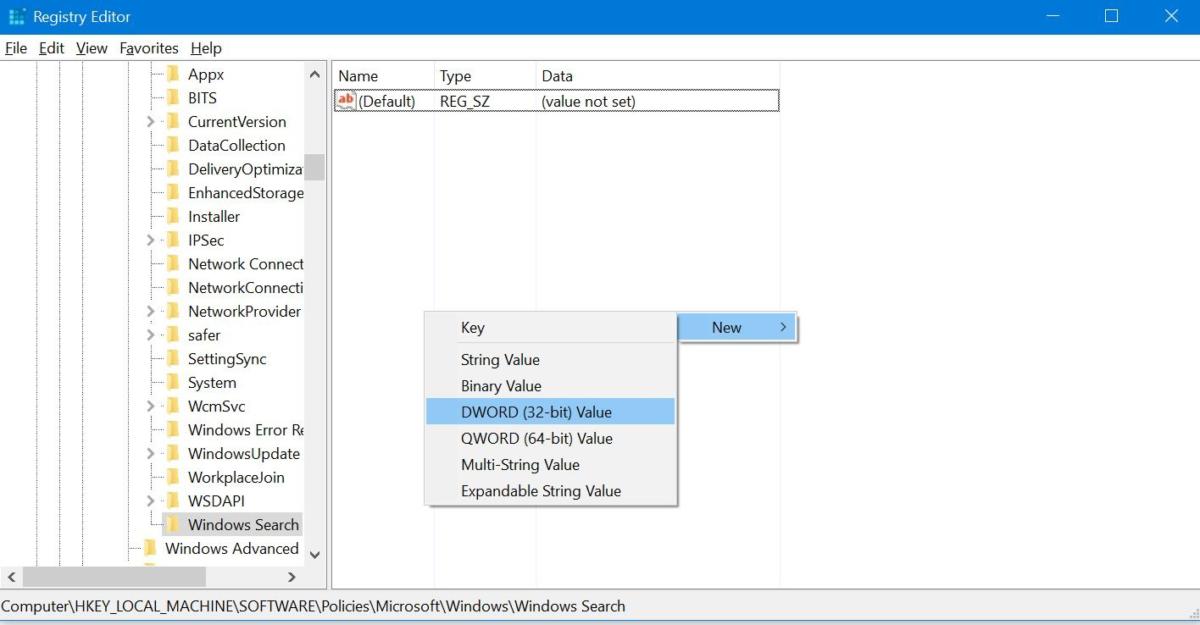
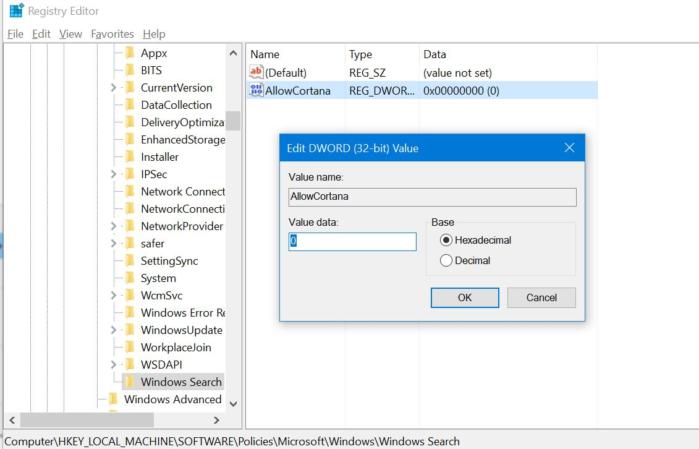
With the Windows Search folder selected in the left-hand navigation pane, right-click in the main portion of the window and select New > DWORD (32-bit) Value. A new listing will appear in the main pane, ready to be named; christen it AllowCortana. Afterward, double-click it and in the box that appears, ensure that the Value Data is set to ‘0’—minus the quotation marks.
 Brad Chacos/IDG
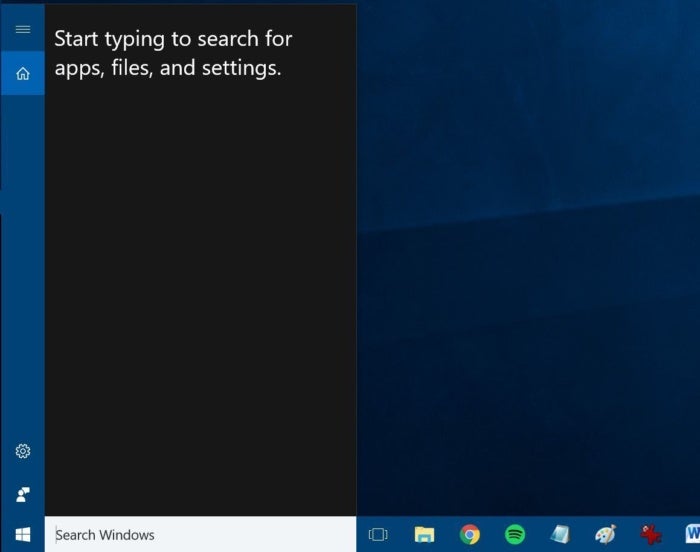
That’s it! Close the Registry Editor, then sign out of Windows 10. When you sign back in, Cortana will be long gone. The digital assistant’s former field remains in the Windows 10 task bar, but it now reads “Search Windows” and tellingly lacks Cortana’s all-seeing eye icon.
You won’t be able to use any Cortana-enabled features in the dumbed-down search field, like setting reminders, getting personalized news, receiving up-to-date travel info, or asking goofy questions. You will be able to search for files, system settings, and terms as before. That said, you won’t be able to tap Cortana’s smarts to perform natural language queries like “Find pictures from June” either, so narrowing down file search results may take a bit more work.
 Brad Chacos/IDG
Adios, Cortana.
Speaking of which, wiping Cortana’s previous memories of you from Microsoft’s servers takes an extra step. Head to Microsoft’s privacy dashboard website, sign into your Microsoft account, and clear whatever personal data you want Microsoft to forget. Be warned: Your choices may also affect other Microsoft services, like Bing, Edge, and Maps.
Cortana isn’t totally dead, though. You’ll still see the process lurking in Task Manager if you pay attention. Kill it and it’ll immediately spring back to life. Your search queries nevertheless stay strictly local.
If you ever decide resummon Cortana, simply retrace your steps in the Registry Editor and either delete the AllowCortana value, or simply set it to “1” instead of “0.”


